Budget Bathroom Vanity Makeover: $74
The bathroom vanity is the first thing you touch every morning and the last thing you see every night — and if yours is a tired builder-grade box with orange-oak doors and a water-stained top, it drags the whole room down with it. Replacing a vanity costs $400 to $1,500 before you've paid a plumber a dime, but here's the secret the hardware store won't tell you: the box underneath the paint is almost always solid wood or perfectly good plywood. The ugly part is only the finish, and a finish can be fixed.
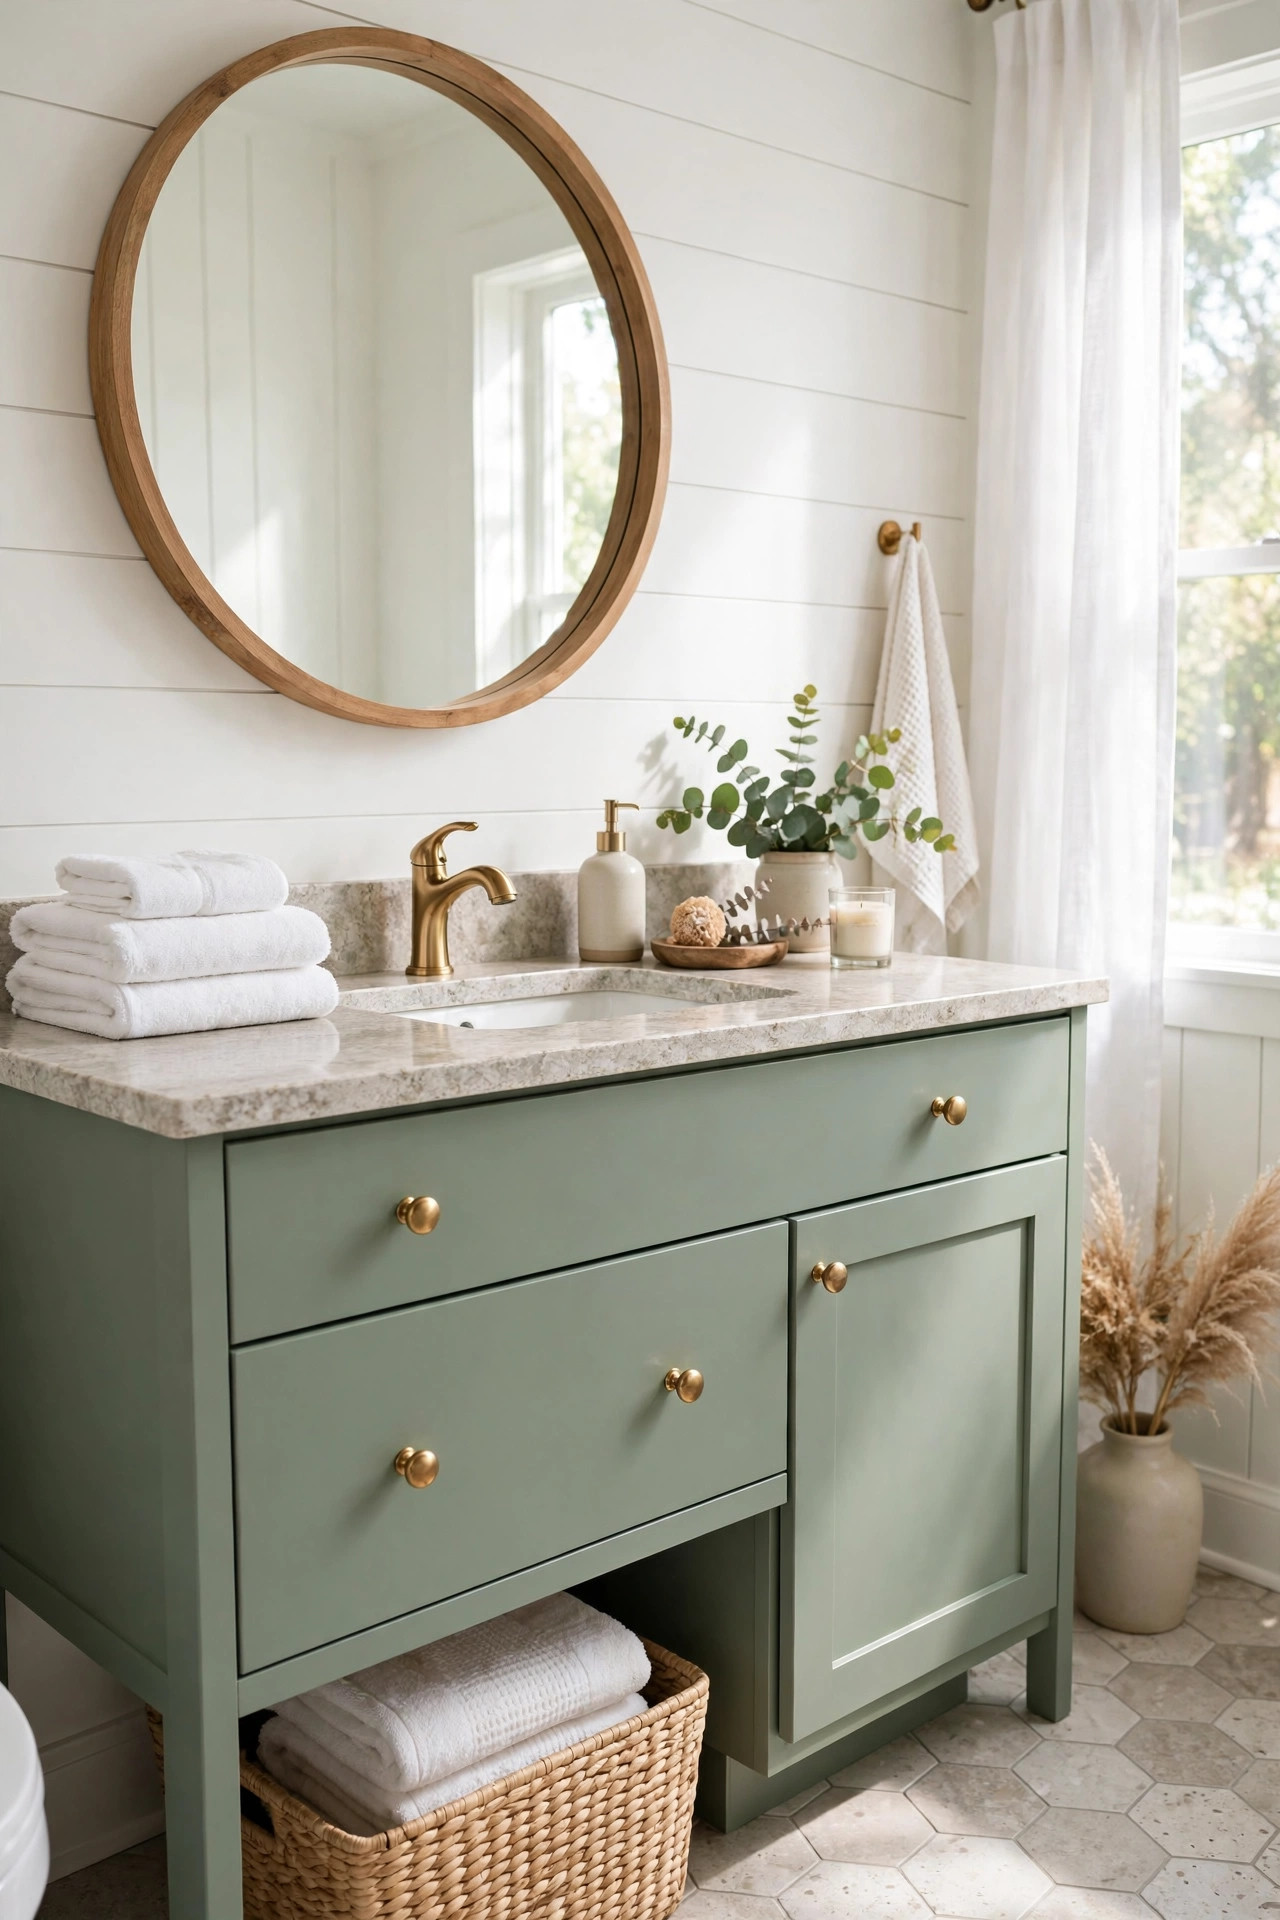
This makeover took a standard 30-inch bathroom vanity — chipped honey-oak doors, 1990s brassy pulls, and a laminate top with a curling-iron burn and a permanent soap-dispenser ring — and turned it into a soft sage-green piece with modern knobs and a stone-look countertop. Total spend: $74. One weekend, no plumber, no demolition, and a vanity that gets mistaken for a boutique find.
Materials You'll Need
- Quart of satin enamel cabinet paint — $18
- Bonding primer (small can) — $8
- 6 brass-look cabinet knobs — $15
- Wood filler + 220-grit sandpaper — $6
- Painter's tape + drop cloth — $7
- Peel-and-stick stone-look countertop film — $14
- White silicone caulk — $6
Step-by-Step Instructions
- Clear out and protect the bathroom. Empty everything from under the sink and off the vanity top. Lay drop cloths over the floor and tape plastic around the toilet and mirror so you can roll and brush freely. Bathroom painting is cramped work — good prep is half the job, and masking the wall and floor edges with painter's tape now saves you an hour of touch-up later.
- Remove the doors, drawers, and hardware. Unscrew every hinge and pull, and label each door's position on its back with a small piece of painter's tape ("L1," "R2," "drawer top"). Drop all the screws into one labeled bag so nothing goes missing. If you're moving the knob positions — say, from a centered pull to an off-center knob — fill the old holes with wood filler now and let it set.
- Clean, fill, and sand. Bathrooms collect a film of toothpaste, hairspray, and soap residue that paint will not stick to, so scrub every surface with a degreasing cleaner first. Fill dents and scratches with wood filler, let it dry, then sand everything with 220-grit sandpaper. You're not trying to reach bare wood — you just need a smooth, deglossed surface the primer can grip. Wipe it all down with a damp cloth afterward.
- Prime with bonding primer. This is the step people skip, and it's the step that decides whether your paint survives bathroom humidity. Brush or roll one coat of bonding primer onto every surface that will be painted — doors, drawer fronts, and the cabinet box. Let it cure for the full time the can recommends; a rushed primer coat is barely better than none.
- Paint two to three thin coats. Use a satin enamel — a urethane-acrylic enamel is ideal for bathrooms because it cures hard and wipes clean. Roll the flat panels with a foam roller and cut in the details with a brush. Thin coats dry harder and smoother than one thick coat, so resist the urge to lay it on. Let each coat dry fully; a quick pass with 320-grit sandpaper between coats gives you a glassy, professional finish.
- Refresh the countertop with peel-and-stick film. Clean the laminate top thoroughly and let it dry. Cut the film a few inches oversized, peel back the first few inches, and squeegee it down slowly as you unroll — pushing air bubbles out ahead of you instead of trapping them. Wrap the edges underneath the top for a clean finished look. If there's a sink, lay the top first, then cut the sink opening with a sharp craft knife after the film is fully adhered.
- Reinstall everything and recaulk. Screw on the new knobs, rehang the doors using your tape labels so the hinges go exactly where they came from, and adjust the hinge screws until the gaps are even. Run a fresh bead of white silicone caulk where the vanity meets the wall and the floor — this is the detail that makes it look installed, not just painted. Wait 24 hours before loading it back up so the caulk fully cures.
Budget Breakdown
| Item | Cost |
|---|---|
| Quart of satin enamel cabinet paint | $18 |
| Bonding primer | $8 |
| 6 brass-look cabinet knobs | $15 |
| Wood filler + 220-grit sandpaper | $6 |
| Painter's tape + drop cloth | $7 |
| Peel-and-stick stone-look countertop film | $14 |
| White silicone caulk | $6 |
| Total | $74 |
Before & After
Before: a honey-oak vanity with a chipped door, original 1990s brassy pulls, and a laminate top carrying a curling-iron burn and a permanent ring from the soap dispenser. It was clean, but tired — the kind of vanity that makes even a freshly mopped bathroom look dated.
After: soft sage-green paint, six new brass-look knobs, and a marble-look countertop that fools everyone who touches it. The mirror and light fixture didn't change at all — the room still reads a decade newer because the vanity is no longer fighting everything else in it.
The biggest surprise was the countertop film. Visitors assume it's real stone until they lean in close. For $14 and an hour of careful squeegeeing, it erased the single ugliest feature in the room — and it has survived daily sink splashes for months without a single peeling edge.
Tips for Your Own Vanity Makeover
- Don't skip the bonding primer in a bathroom. Steam is the enemy of paint adhesion. A coat of bonding primer is the difference between paint that lasts for years and paint that peels off in sheets by spring.
- Label every door and hinge. Doors shift a millimeter here and there over the years, and hinges fit best exactly where they started. Two seconds of tape-labeling saves twenty minutes of re-adjusting.
- Thin coats, always. Thick paint takes forever to cure, drips in the corners, and chips more easily. Two thin coats beat one heavy coat every single time.
- Use satin or semi-gloss, never flat. Flat paint shows every splash and can't be wiped down without marking. Satin enamel shrugs off toothpaste splatter with a damp cloth.
- If the countertop film bubbles, don't peel it all up. Prick the bubble with a pin and smooth it flat — one tiny hole beats re-doing the whole top and wasting another roll.
Frequently Asked Questions
- Will painted vanity cabinets hold up in a steamy bathroom?
- Yes, if you prime with a bonding primer and finish with a satin or semi-gloss enamel. That combination cures into a hard, moisture-resistant shell. The one rule: run the exhaust fan during showers — even great paint suffers under constant condensation.
- Can I use peel-and-stick film on a bathroom countertop?
- Yes. Waterproof vinyl film handles daily sink splashes just fine. The keys are a clean, dry surface, smoothing bubbles out as you lay it, and sealing the edges — especially around the sink — with a thin bead of silicone caulk.
- Do I need to sand off all the old finish?
- No. You only need to degloss: a pass with 220-grit sandpaper to give the primer something to bite into. If the old finish is peeling or flaking, scrape the loose bits off and sand those spots smooth — but a sound finish underneath is fine to paint over.