Thrift Store Dresser Flip: $25 to Stunning
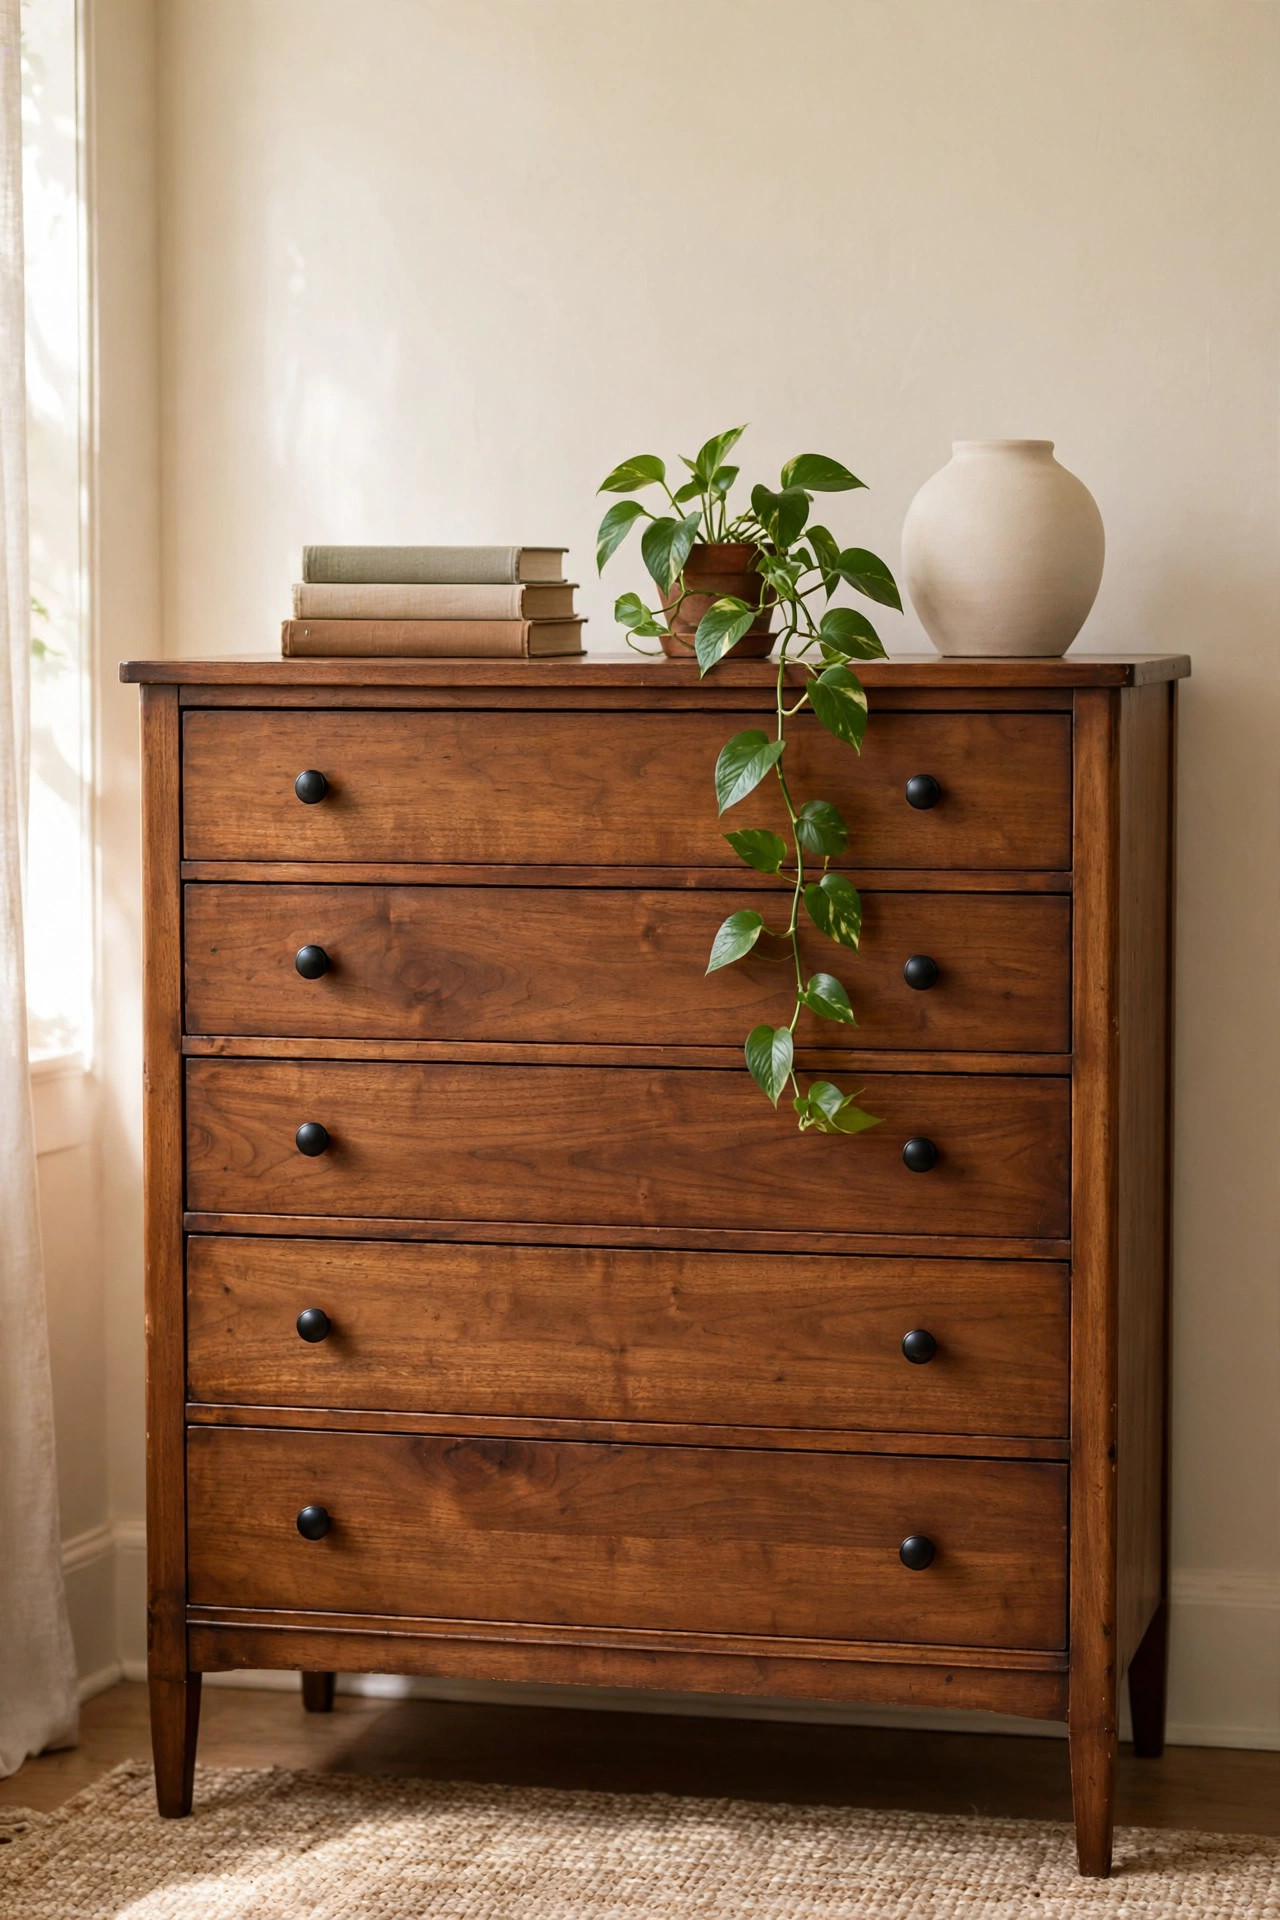
There's a special thrill in rescuing furniture. This dresser was sitting in the back corner of a thrift store with a $25 tag, covered in scratches, sporting wobbly 90s knobs and a top ringed with cup stains. Underneath all of that: solid wood, dovetailed drawers, and good bones. Twenty minutes of inspection told me everything I needed to know — this was a flip worth doing.
One Saturday later, it looked like something from a boutique furniture store. The whole project cost $58 including the dresser itself, and taught me every core furniture-refinishing skill: sanding, staining, sealing, and hardware swaps. If you've never flipped furniture, a dresser is the perfect first project — big enough to matter, small enough to finish.
Materials You'll Need
- Thrift store dresser, solid wood — $25
- Wood stain, warm walnut (half-pint) — $9
- Clear matte polyurethane topcoat (quart) — $14
- Matte black knobs (6-pack) — $10
- 120- and 220-grit sandpaper, tack cloth — on hand / $0
- Foam brushes, clean rags, wood glue — on hand / $0
Step-by-Step Instructions
- Inspect before you buy. Check that drawers slide, the frame is square (no wobbling when pushed diagonally), and the piece is solid wood or wood veneer — not particleboard with peeling laminate. Surface scratches are fine; structural damage is not.
- Strip the old finish. Remove all hardware and sand the entire piece: 120-grit to remove the old finish and scratches, then 220-grit for a smooth surface. Always sand with the grain. Wipe clean with a tack cloth.
- Repair as needed. Tighten loose joints with wood glue and clamps. Fill deep gouges with stainable wood filler, let dry, and sand flush.
- Apply the stain. Brush or wipe stain on with a clean rag, working in the direction of the grain. Let it sit 5–10 minutes, then wipe off the excess. One coat gives a natural look; a second coat deepens the color. Let dry 24 hours.
- Seal with polyurethane. Apply two to three thin coats of matte poly, lightly sanding with 220-grit between coats. This is what protects the top from cups, keys, and daily life — don't skip it.
- Install new knobs. Measure and mark knob placement on each drawer front so they're perfectly aligned. Drill if needed, attach, and tighten from inside the drawer.
- Style and place. Wax the drawer runners with a candle stub so they glide, load the drawers, and style the top simply: a stack of books, a plant, one decorative object. Done.
Budget Breakdown
| Item | Cost |
|---|---|
| Thrift store dresser | $25 |
| Walnut wood stain (half-pint) | $9 |
| Matte polyurethane (quart) | $14 |
| Matte black knobs (6) | $10 |
| Sandpaper, rags, glue | $0 (on hand) |
| Total | $58 |
Before & After
Before: a scratched, orange-toned dresser with mismatched knobs and a water-ringed top, exiled to the thrift store's back corner. It looked tired and a little sad — the kind of piece people walk past.
After: rich warm walnut with a soft matte sheen, crisp black knobs lined up like soldiers, and a top smooth enough to make you want to touch it. It now anchors the bedroom and gets compliments from everyone who sees it. Nobody believes the $25 origin story until I show them the "before" photo.
What surprised me most: the stain didn't just change the color, it revealed the wood. The old orange finish had been hiding genuinely pretty grain. That's the magic of solid wood furniture — the good stuff is often just buried under a bad finish.
Tips for Your First Furniture Flip
- Buy bones, not beauty. Solid wood + sturdy joints + smooth drawers = a great flip candidate, regardless of how ugly the finish is.
- Test stain on the back first. Every wood takes stain differently. A hidden test spot saves you from a color you hate on the most visible surface.
- Thin poly coats beat thick ones. Thick polyurethane drips, bubbles, and stays tacky. Three thin coats with light sanding between = glass-smooth.
- Count your hardware before shopping. Nothing kills momentum like discovering mid-project that you need two more knobs.
- Check thrift stores on weekday mornings. New donations hit the floor early in the week, and the good wood pieces go fast.
Frequently Asked Questions
- How do I tell solid wood from veneer or laminate?
- Look at an unfinished edge (inside a drawer or underneath). Solid wood shows continuous grain; veneer shows a thin layer over a different core; laminate is printed plastic that peels at edges. Veneer is still flippable — just sand very gently so you don't burn through the thin layer.
- Can I paint instead of staining?
- Absolutely — painted dresser flips are classic. Use the same prep (sand, clean), then bonding primer + two coats of enamel. Paint is more forgiving than stain on imperfect wood, but stain shows off good grain better.
- Is flipping furniture actually profitable if I sell?
- It can be, but buy low and know your market. A $25 dresser flipped for $58 in materials can sell for $150–$250 depending on your area. Price based on comparable listings, photograph in good light, and don't undervalue your Saturday.