DIY Kitchen Island on a Budget: $120
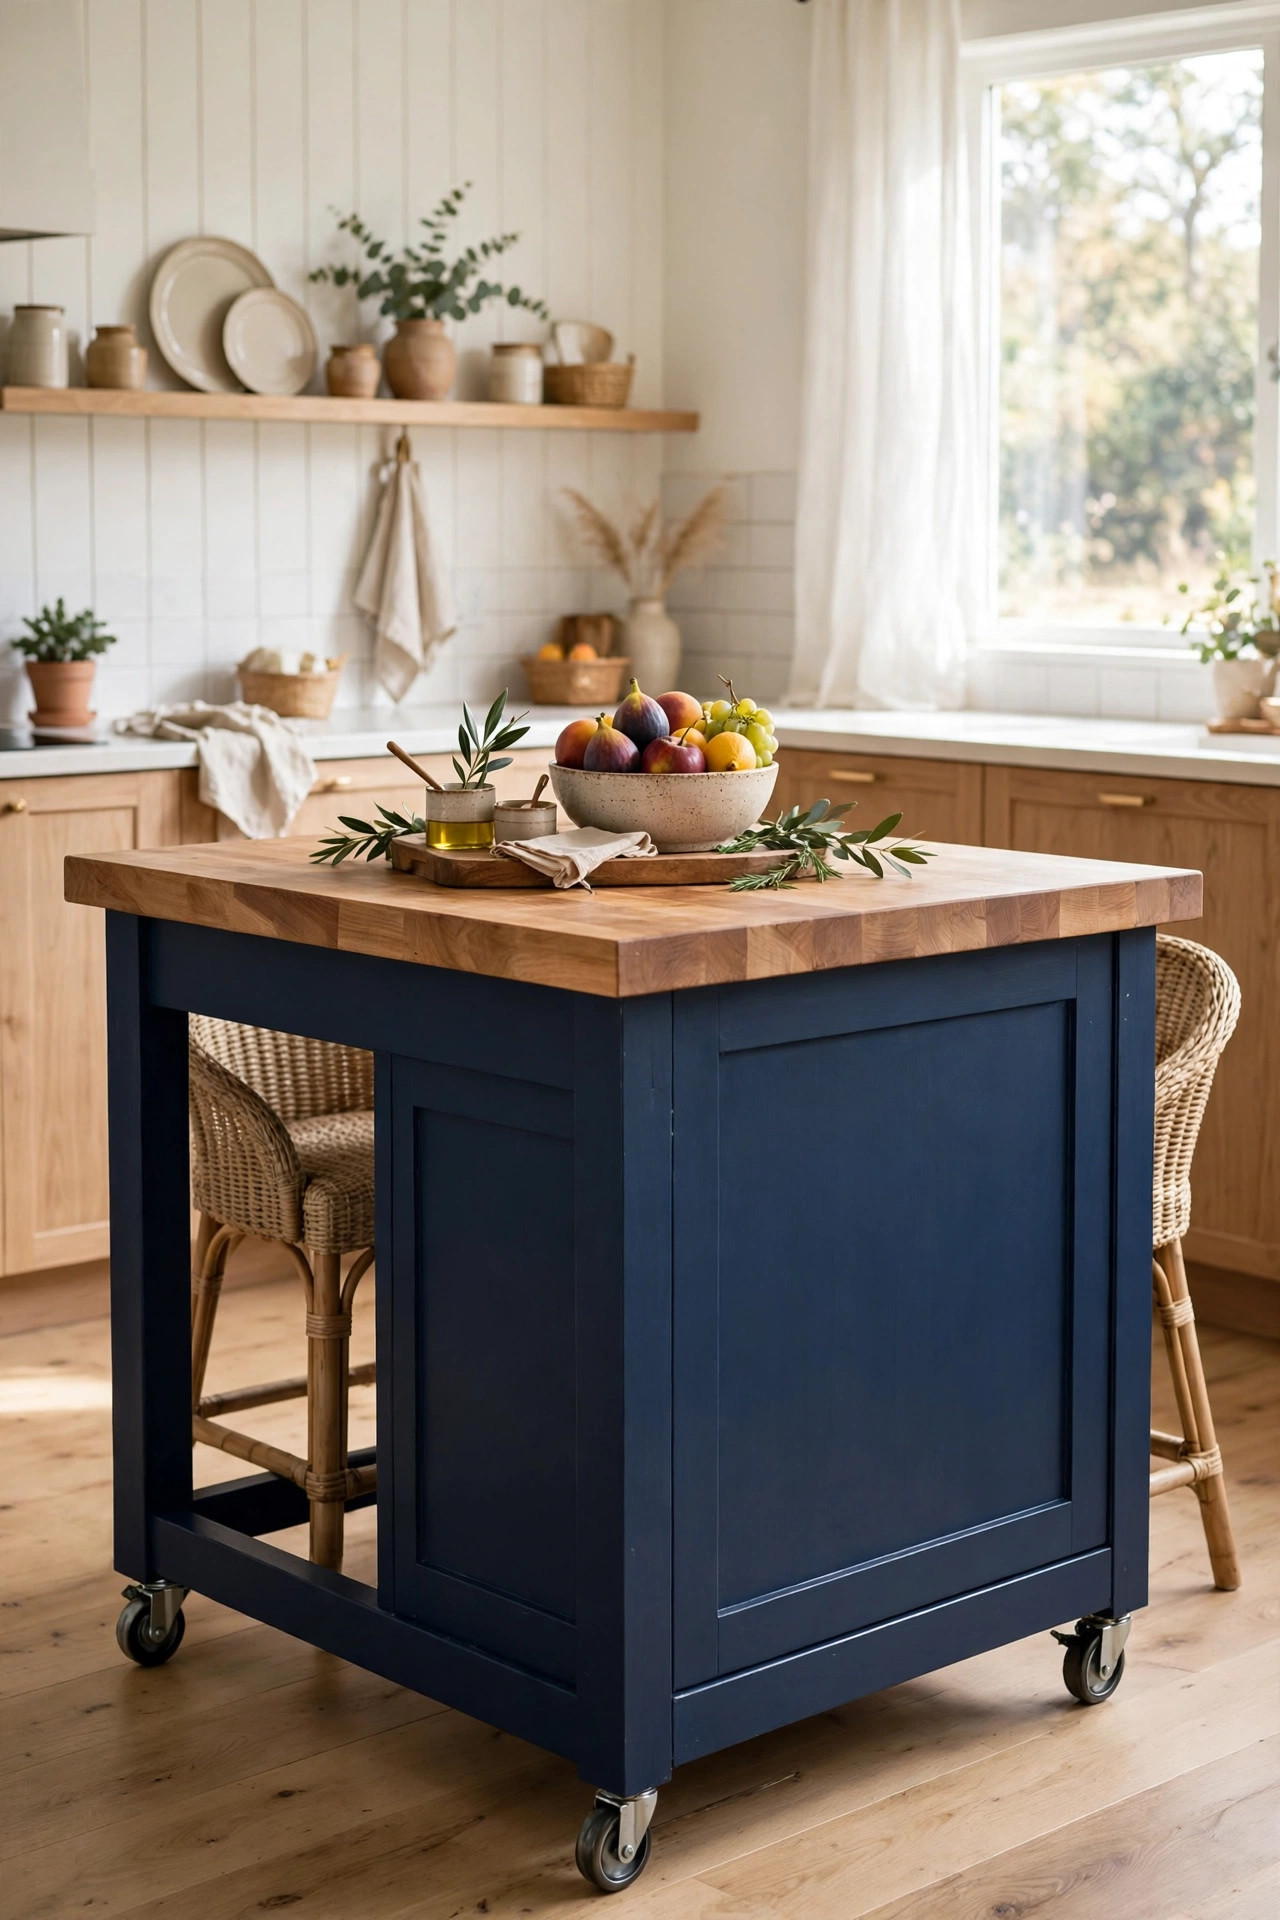
A kitchen island is the single biggest upgrade a kitchen can get: prep space, storage, a place to eat, a landing zone for groceries. It's also the single most expensive — retail islands start around $400 for flimsy particle-board boxes and climb past $2,000 for anything with real wood. For most of us, that's not a weekend project, that's a financing decision.
This island cost $120 and a weekend. Two stock base cabinets joined back-to-back give you real cabinet storage on both sides; a butcher-block-look slab top provides a durable work surface with a proper overhang; and four locking casters make the whole thing roll out of the way when you need floor space. It looks built-in, works like furniture, and moves like a cart.
Materials You'll Need
- 2 stock base cabinets (unfinished or secondhand) — $50
- Butcher-block-look countertop slab — $35
- Bonding primer + cabinet paint — $18
- Locking caster wheels (4-pack) — $12
- Cabinet pulls — $5
Step-by-Step Instructions
- Source two matching base cabinets. Unfinished stock cabinets from a home-improvement store are the easiest find — standard 24-inch-deep base cabinets are sold individually and cost far less than a "kitchen island kit." Secondhand is even cheaper: check cabinet resellers, salvage yards, and renovation leftovers, where contractors sell pulled-but-solid cabinets for a fraction of retail. Matching matters — same height, same depth, same door style.
- Measure your kitchen before you build. A standard island needs at least 36 inches of clearance on every working side — 42 is better. Tape the island's footprint on your floor and walk around it for a day: open the oven, the dishwasher, the fridge. If the taped box fights your appliances, shrink the plan (use one cabinet instead of two) rather than the clearance. An island that blocks the oven door is not an upgrade.
- Join the cabinets back-to-back. Place the cabinets back-to-back so the doors face outward on both sides — now you have storage from both sides of the island. Clamp them together, check that the tops are level, and drive screws through the face frames or side panels to lock them into one unit. Fill any gaps between the cabinets with a strip of wood or a bead of paintable caulk so the finished piece reads as one solid island.
- Sand, prime, and paint. Fill any dents or screw holes, sand everything with 220-grit, wipe clean, and apply a coat of bonding primer. Then roll two thin coats of satin enamel — a deep color like navy, forest green, or charcoal makes an island look like a deliberate design choice rather than two cabinets bolted together. Paint the backs of the doors too; both sides are visible now.
- Mount the locking casters. Flip the island upside down (get a helper — it's heavy) and screw a caster into each corner of the base. Locking casters are non-negotiable: unlocked, an island drifts every time you lean on it to chop. Position them slightly inset from the corners so they don't catch toes. Quality casters rated for the loaded weight are worth the extra few dollars.
- Fit the countertop with an overhang. The slab should overhang the cabinet box by 1 to 1.5 inches on the working sides — enough to sit at comfortably with a stool, not enough to tip. On unfinished wood tops, sand the edges smooth and seal with food-safe mineral oil or a hardwax oil; on laminate or veneer slabs, a thin bead of clear caulk along the underside keeps crumbs and water out of the seam.
- Install the cabinet pulls. Consistent hardware on both sides sells the "furniture" illusion. Drill carefully with a template or a measured jig so the pulls sit level — mismatched pulls on a big flat island are very visible. Bar pulls in a contrasting finish (brass on navy, black on white) are the classic budget-luxe move.
- Style it and load it up. Slide in two stools, add a tray or fruit bowl on top, and stock the cabinets with the things that never fit anywhere: the stand mixer, the sheet pans, the bulk spices. Leave the top mostly clear — an island's job is to be worked on, not to be a shelf. Lock the casters once it's positioned, and you're done.
Budget Breakdown
| Item | Cost |
|---|---|
| 2 stock base cabinets | $50 |
| Butcher-block-look countertop slab | $35 |
| Bonding primer + cabinet paint | $18 |
| Locking caster wheels (4-pack) | $12 |
| Cabinet pulls | $5 |
| Total | $120 |
Before & After
Before: a kitchen with six linear feet of counter — permanently colonized by the coffee maker, the dish rack, and the knife block — and a dead zone of empty floor in the middle where two people couldn't prep dinner together.
After: a navy rolling island dead center: four cabinets of storage (two per side), a slab top that doubles the prep space, and two stools that turned the kitchen into the room everyone gathers in. It unlocked casters and rolls aside when the floor needs mopping, then locks back into place.
The storage was the real revelation. The island swallowed the stand mixer, the sheet pans, and the lunch boxes — three things that had lived on counters and in precarious stacks for years. It didn't just add an island; it subtracted clutter from everywhere else.
Tips for Your Own Kitchen Island
- Respect the 36-inch rule. Less than 36 inches of clearance on a working side and the island becomes an obstacle, not an asset. Tape the footprint first and live with it for a day before you build.
- Locking casters, not fixed ones. An island that rolls away while you're kneading dough is a safety hazard. Lock all four when it's in position; unlock only to move it.
- Paint it a color, not white. White islands blend into white kitchens and read as "more cabinets." A color — navy, green, charcoal — makes it look like intentional furniture.
- Seal the top like you'll actually use it. If it's real wood, oil it; if it's a film-covered slab, caulk the underside. An island top sees knives, hot pans, and spilled everything.
- Balance the weight before you roll it. Heavy items (mixer, cast iron) go low and centered. A top-heavy island on casters tips — load it like a pyramid, wide at the bottom.
Frequently Asked Questions
- How much weight can a DIY island like this hold?
- Two joined stock base cabinets on quality casters comfortably hold several hundred pounds of distributed weight — dishes, small appliances, a full prep session. The casters are the limit: buy ones rated for at least 75 lbs each and you'll be well within spec.
- Do I need power tools to build this?
- A drill/driver is strongly recommended for driving the joining screws and mounting the casters, but that's the only power tool you need. Everything else — measuring, sanding, painting — is hand work. A drill/driver is the most-borrowed tool in DIY; ask a neighbor before you buy one.
- Will the casters damage my floors?
- Use soft rubber or polyurethane casters on wood and tile floors — never hard plastic. Lock them when stationary so grit doesn't grind under a drifting wheel. If your floors are already delicate, cut felt pads to fit under the caster cups as extra insurance.