DIY Limewash Wall for Under $50
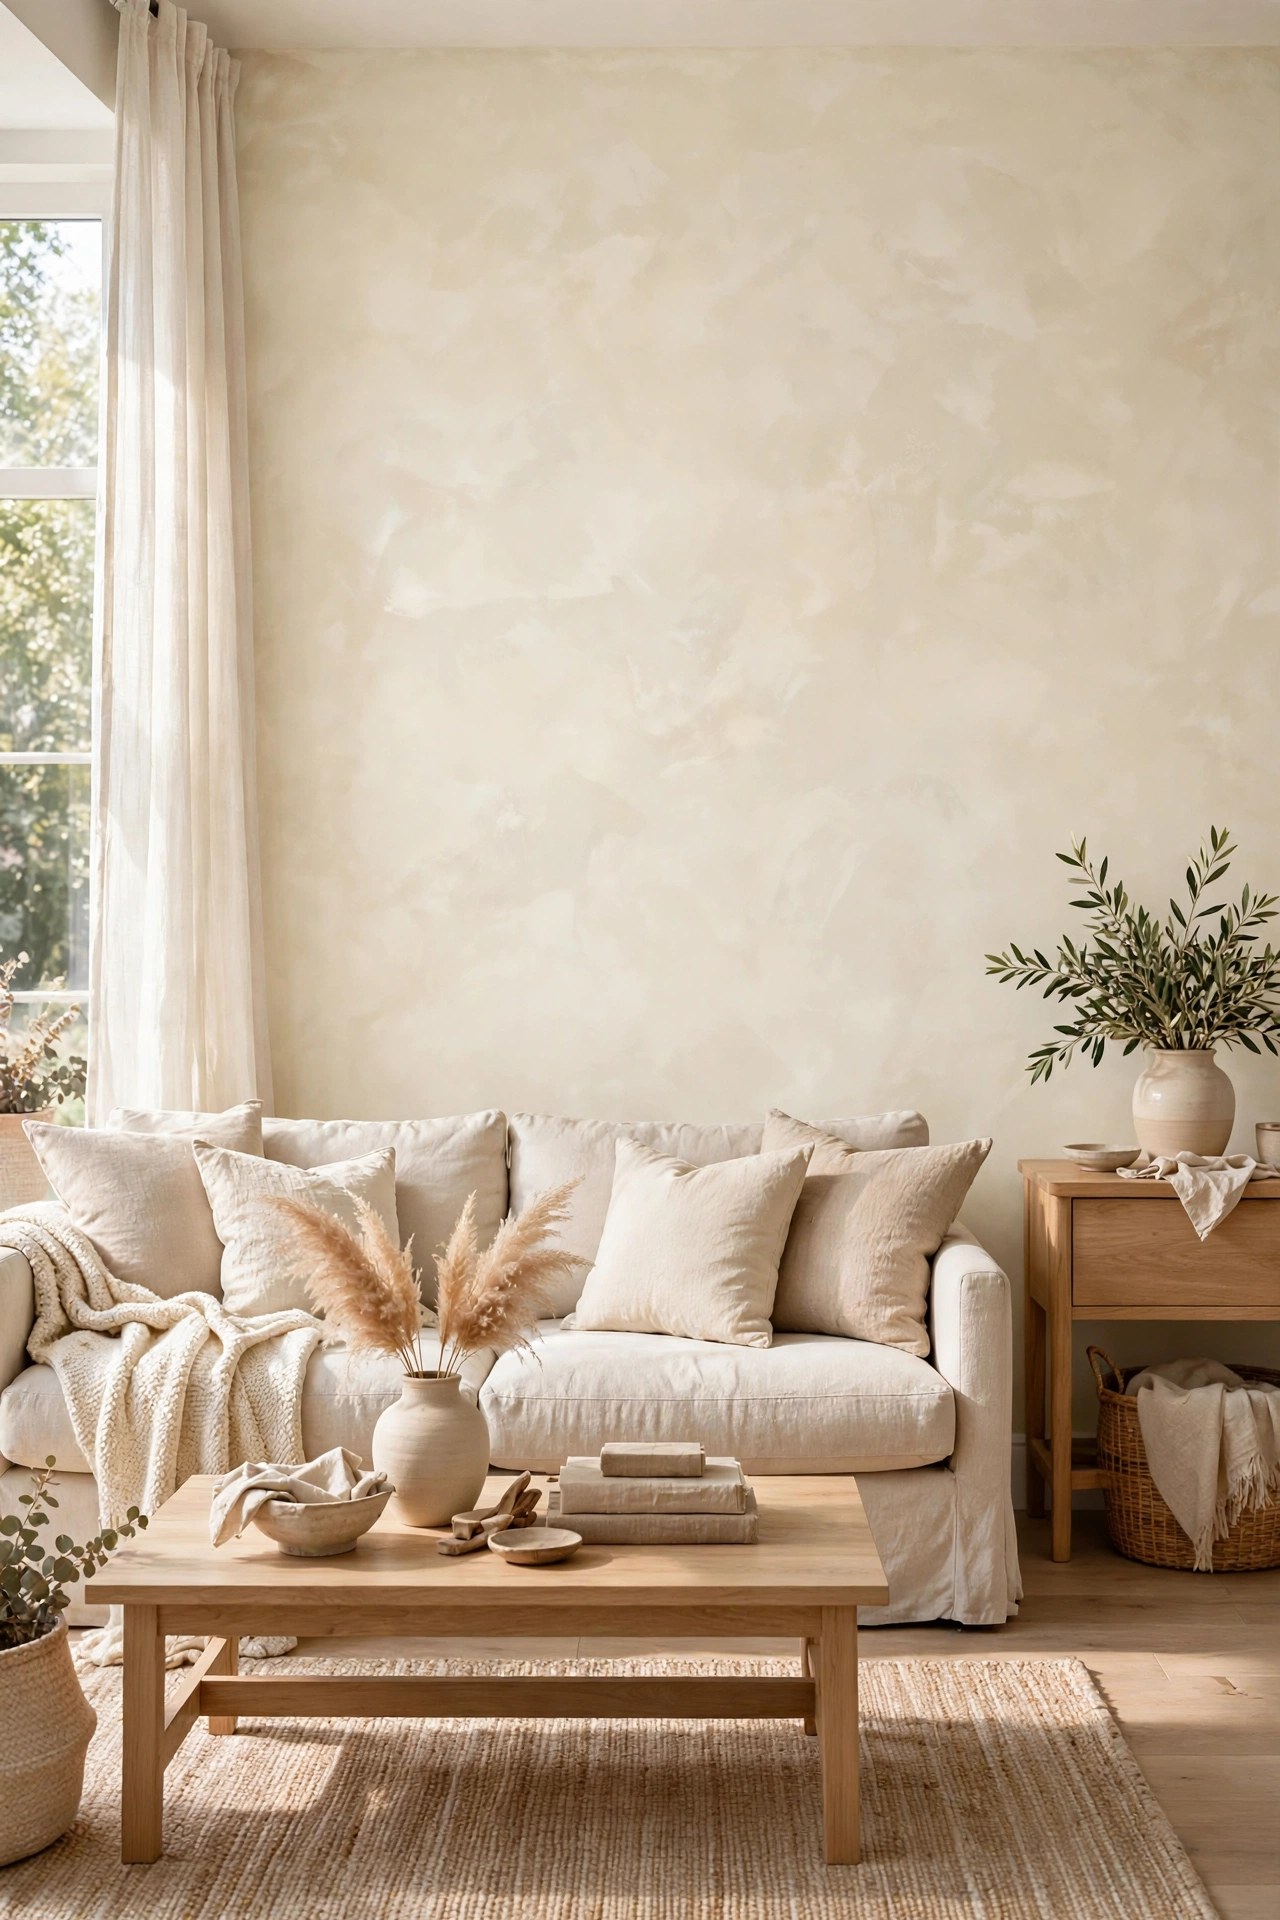
Limewash is the finish behind every "old European villa" Pinterest board — soft, cloudy, with depth that flat paint can't touch. The catch? Designer limewash paint runs $50+ a gallon and pros charge hundreds per wall. But the budget versions have gotten genuinely good, and the technique is forgiving in a way regular painting isn't. Unevenness is literally the point.
This wall took one afternoon and $50. One accent wall, one gallon of budget limewash, one big brush, and a technique so simple it feels like cheating. If you've been staring at a boring flat wall, this is the highest-impact $50 in home decor.
Materials You'll Need
- 1 gallon budget limewash paint, warm off-white — $35
- Large limewash block brush (or 4" chip brushes, 2-pack) — $7
- Painter's tape, 1 roll — $5
- Canvas drop cloth (or old bed sheets) — $3
- Bucket, stir stick, water — on hand / $0
Step-by-Step Instructions
- Prep the wall. Fill nail holes, sand rough spots, and wipe the wall clean. Limewash shows texture beautifully — but it also shows dirt and drips, so start with a clean, matte surface. If your wall is glossy, scuff-sand it first.
- Tape edges and lay drops. Tape off trim, ceiling, and adjacent walls. Limewash is thinner than regular paint and splatters more — cover floors generously.
- Stir — don't shake — the paint. Limewash separates in the can. Stir thoroughly and add a splash of water if it feels thick; you want a consistency like heavy cream. Work from one stirred bucket so the color stays consistent.
- Apply with crisscross strokes. Load the block brush and paint in loose X-shaped strokes, about 2x2 feet at a time. Overlap your X's randomly. This is the whole technique — the crossing strokes create the cloudy movement. Don't overwork it; three or four passes per section is plenty.
- Let the first coat dry fully. Limewash dries dramatically lighter than it looks wet — don't panic at the wet color. Wait at least 4 hours (overnight is safer), then apply a second coat with the same crisscross motion, offsetting your strokes from the first coat.
- Pull tape and live with it a day. Remove tape while the second coat is tacky for the cleanest line. Then give it 24 hours before judging — limewash keeps developing subtle variation as it cures. Seal only if the wall is in a splash zone; most living-room and bedroom walls don't need it.
Budget Breakdown
| Item | Cost |
|---|---|
| Budget limewash paint (1 gallon) | $35 |
| Limewash block brush | $7 |
| Painter's tape (1 roll) | $5 |
| Canvas drop cloth | $3 |
| Bucket, stir stick, water | $0 (on hand) |
| Total | $50 |
Before & After
Before: a flat, builder-grade greige wall that disappeared into the background. The room had nice furniture but the walls gave it all the personality of a waiting room — technically fine, emotionally nothing.
After: the wall has movement now. In morning light it's warm and creamy; by evening lamp-light it goes moody and textured. Guests touch it — everyone touches a limewash wall the first time. The whole room feels more expensive, more collected, more intentional, and all I did was paint one wall with a $35 gallon of paint.
The biggest surprise was how forgiving it is. I'm a decent painter but not a great one, and limewash hides every flaw that regular paint would broadcast. Roller marks, brush strokes, uneven pressure — all of it just becomes "texture."
Tips for Your Own Limewash Wall
- Go one shade warmer than you think. Limewash reads cooler and lighter when dry. If you're torn between two whites, pick the warmer one.
- Don't paint in direct sun or heat. Limewash dries fast; hot walls make it dry before you can blend, leaving harsh edges. Morning or evening is ideal.
- Keep a wet edge within each section but don't stress about the whole wall — the variation between sections is what creates the effect.
- Test on poster board first. Paint a large board, prop it against the wall, and live with it for a day in different light before committing.
- Skip the accent-wall cliché placement. Limewash also looks incredible in small powder rooms, behind open shelves, or on a fireplace surround.
Frequently Asked Questions
- What's the difference between limewash and regular paint?
- Limewash is a crushed-limestone-based paint that dries with natural tonal variation — cloudy, mottled, with visible brush movement. Regular paint dries flat and uniform. Limewash is also mineral-based, so it's naturally breathable and low-odor.
- Can I limewash over already-painted walls?
- Yes, as long as the existing paint is matte or eggshell and in good condition. Scuff-sand glossy paint first. Budget limewash formulas are designed to go over standard latex paint — no special primer needed.
- Will it work in a bathroom or kitchen?
- For low-splash areas, yes. For steamy bathrooms or behind a stove, seal it with a matte mineral sealer after curing. Unsealed limewash can spot if it gets repeatedly wet.