DIY Pegboard Organizer Wall: $35
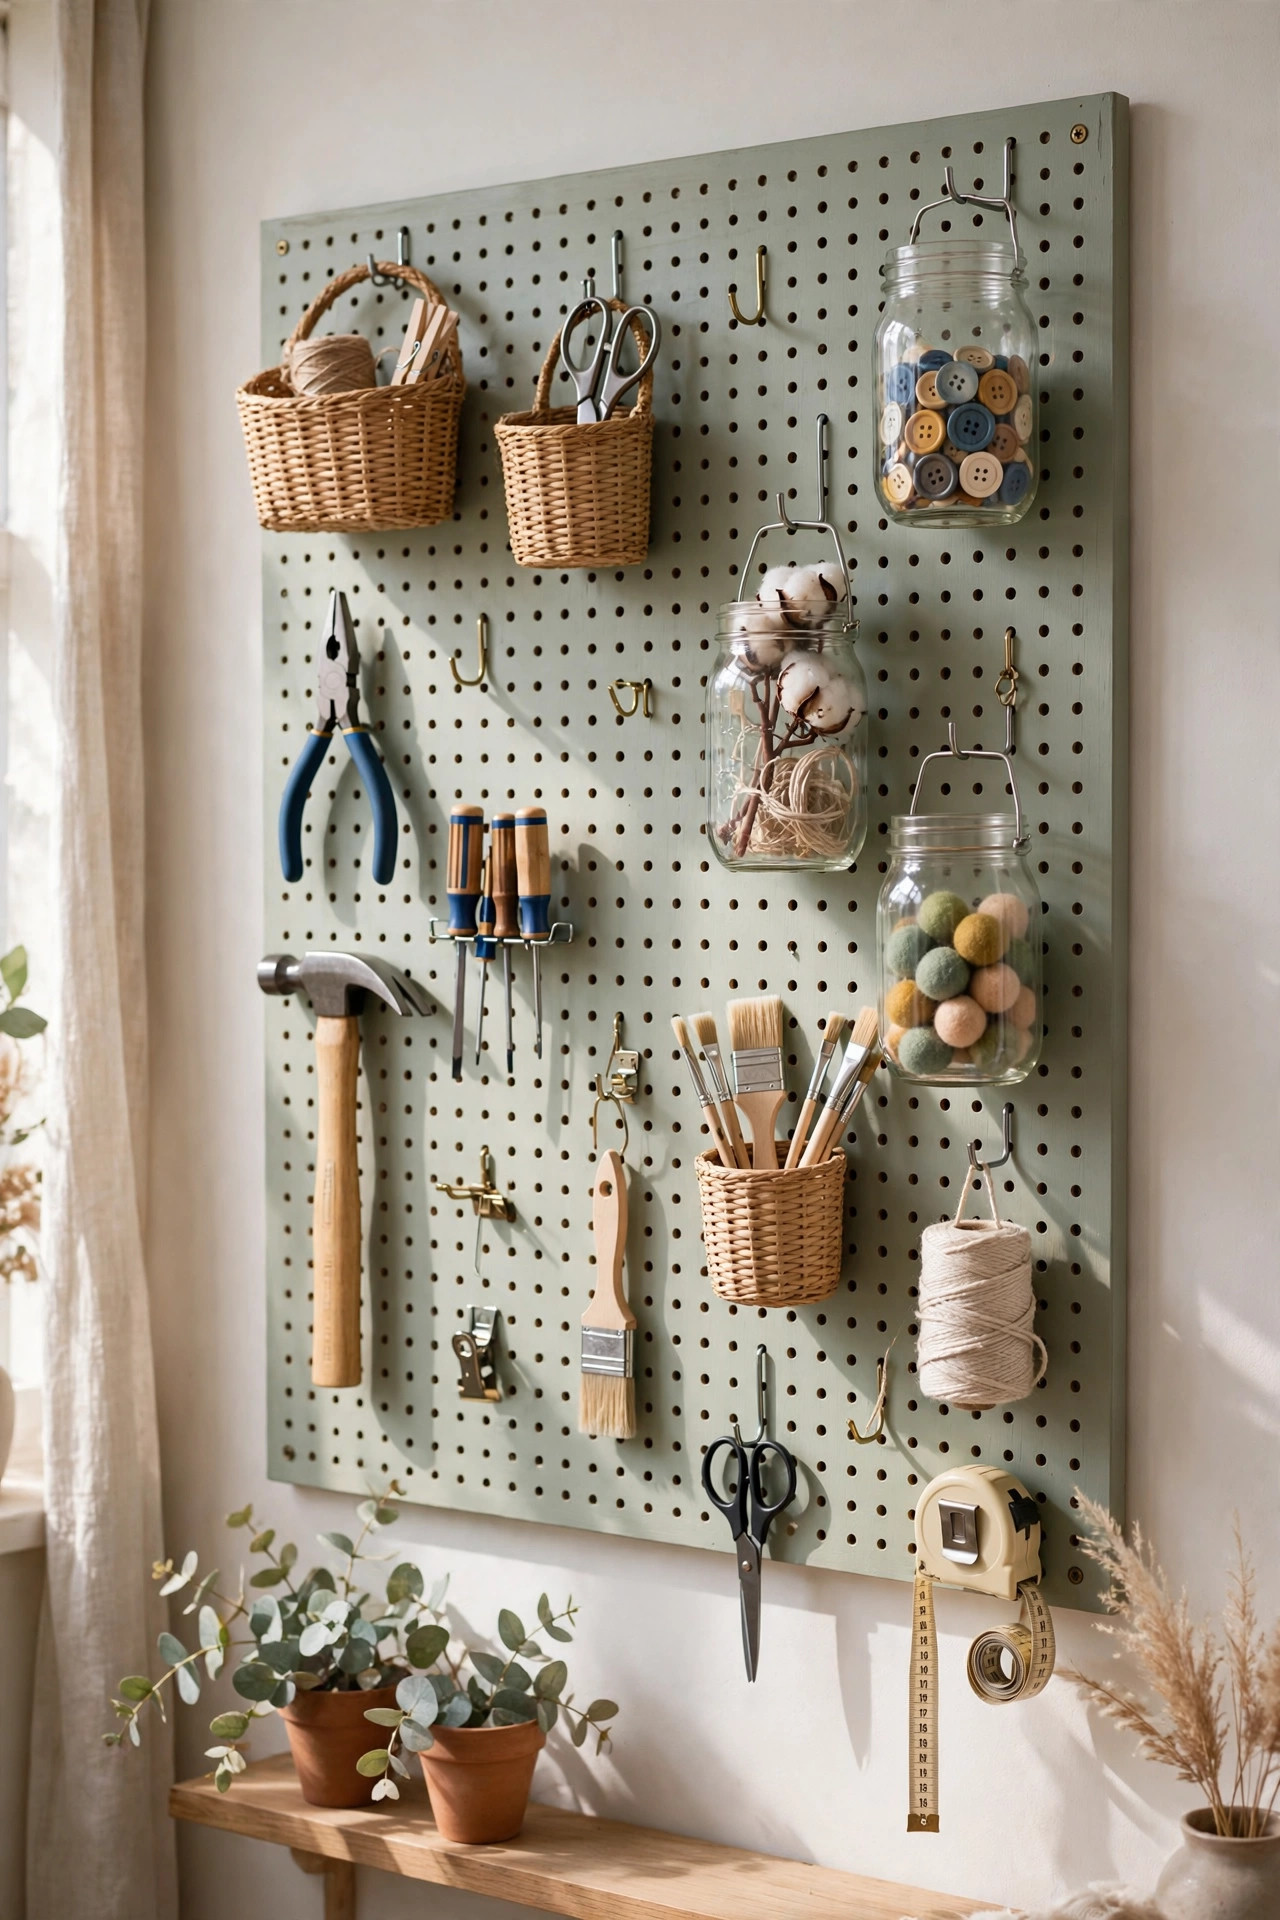
Craft supplies, tools, and office odds and ends have a way of colonizing every flat surface in the house. Drawers become junk graveyards, and the thing you need is always at the bottom of the thing you don't. A pegboard wall fixes it by moving storage vertical: everything visible, everything reachable, everything in a labeled zone.
This pegboard organizer wall cost $35 total: a 2×4-foot pegboard panel, two furring strips, an assorted hook-and-holder pack, a sample-size paint for a custom finish, and mounting hardware. It holds a full craft station's worth of tools on four feet of wall — and because everything hangs on movable hooks, the layout evolves as your projects do. One Saturday, basic tools, and the most satisfying before-and-after in this whole series.
Materials You'll Need
- 2×4-foot pegboard panel — $12
- 1×2 furring strips (2) — $6
- Assorted pegboard hooks and holders pack — $8
- Sample-size paint — $5
- Screws + wall anchors — $4
Step-by-Step Instructions
- Plan your zones on paper first. Sketch the 2×4-foot rectangle and divide it into zones by task: cutting tools, adhesives, paint supplies, measuring. List everything that will hang and roughly where. This ten-minute sketch prevents the classic pegboard mistake — a random scatter of hooks that looks busy instead of organized.
- Paint the pegboard before mounting. A painted pegboard looks custom; raw brown hardboard looks like a garage (fine for garages, less fine for craft rooms). Roll on two coats of a sample-size paint in your room's accent color — soft white, sage, or even a bold color for a statement wall. Paint both sides so the back doesn't look unfinished from an angle, and let it cure overnight.
- Cut and attach the furring strips. Pegboard hooks need about 3/4 inch of clearance behind the panel to seat properly, which is what the furring strips provide. Cut two 1×2 strips to the panel's width and screw them horizontally to the back of the pegboard — one near the top, one near the bottom. This also keeps the panel perfectly flat against the wall.
- Mount it solidly to the wall. Hold the panel level on the wall, mark through the strips, and drive screws into studs wherever possible — a loaded pegboard gets heavy. Where there's no stud, use proper wall anchors rated for the weight. A 2×4 panel with strips sits about an inch off the wall, which is exactly the clearance the hooks need.
- Load the hook variety pack. The assorted packs are the best value: standard single hooks for scissors and rulers, double-prong hooks for rolls of tape and ribbon, small baskets for markers and brushes, and ring holders for jars. Start with the big zones from your sketch, hanging the most-used items at arm height and the rarely-used ones up high.
- Arrange, then live with it for a week. Hang everything according to the plan, then use it for a week before finalizing. You'll discover within days that the scissors belong closer to the cutting mat and the glue gun needs a lower hook. Pegboard's superpower is that rearranging takes seconds — move hooks, not furniture.
- Add jars and small baskets. The finishing layer: mason jars in ring holders for buttons, beads, and screws; small wire baskets for paint tubes and brushes. These turn the pegboard from a tool hanger into a complete workstation — every supply visible at a glance, nothing buried in a drawer.
- Outline the hooks (optional pro move). Once the layout is final, trace each tool's silhouette on the pegboard with a paint pen. It looks fantastic — and more importantly, it shows instantly when something hasn't been put back. Workshops have done this for decades because it works.
Budget Breakdown
| Item | Cost |
|---|---|
| 2×4-foot pegboard panel | $12 |
| Two 1×2 furring strips | $6 |
| Assorted hooks and holders pack | $8 |
| Sample-size paint | $5 |
| Screws + wall anchors | $4 |
| Total | $35 |
Before & After
Before: a craft corner where supplies lived in three stacked bins and a junk drawer — every project started with twenty minutes of digging and ended with supplies spread across the dining table. The wall above the desk was blank and useless.
After: a sage-painted 2×4-foot pegboard wall holding the entire craft station: scissors and rulers on hooks, jars of buttons and beads, baskets of markers and brushes, rolls of washi tape on prongs — everything visible, everything one reach away. The desk is clear for the first time in years.
The furring strips were the detail that made it feel professional. The panel floats an inch off the wall with a clean shadow line, hooks seat with a satisfying click, and the whole thing looks built-in rather than bolted on. Total build time: about four hours including paint drying.
Tips for Your Pegboard Wall
- Studs first, anchors second. A loaded 2×4 pegboard can weigh 30+ pounds. Hit at least two studs with the furring-strip screws, and use real wall anchors — not the plastic push-ins — everywhere else. A pegboard that pulls off the wall is a disaster you only experience once.
- Buy the variety hook pack, not singles. Individual hooks run $1–2 each and you'll need twenty; an assorted pack costs $8 and includes baskets, prongs, and jar rings you'd never buy separately. It's the single best value in the whole project.
- Paint it — raw hardboard looks unfinished. Two coats of a $5 sample paint transforms brown hardboard into a design element. Match the room's accent color and the pegboard reads as intentional decor, not workshop storage.
- Zone by task, not by size. Grouping all scissors together because they're scissors is less useful than grouping everything for one task together. The cutting zone, the painting zone, the measuring zone — reach for one task, find everything for it.
- Leave 20% of the board empty. A pegboard packed edge-to-edge looks cluttered and leaves no room for the next project. Empty space is what makes the wall look organized — and guarantees a home for the supplies you'll inevitably buy next month.
Frequently Asked Questions
- Will pegboard hooks stay in, or do they fall out?
- Standard hooks can wiggle loose on thin panels — the fix is the furring-strip gap plus hook stabilizers. Small plastic hook locks (a few dollars for a bag) snap over the hook's top prong and keep everything seated permanently. With locks in place, hooks stay put even when you grab tools one-handed.
- Can I put a pegboard in a rental without damaging the wall?
- Yes — mount it with heavy-duty removable adhesive strips rated for the weight, or lean a framed pegboard panel against the wall on a desk. The adhesive route works for lightly loaded boards; for a fully loaded craft wall, a French cleat (two interlocking wood strips) leaves only four small screw holes to patch later.
- What size pegboard should I start with?
- A 2×4-foot panel is the sweet spot for most rooms — big enough to hold a full workstation, small enough to mount solo and fit above a desk. Go bigger only if you have the wall and the studs for it; you can always add a second panel later, and two panels look better than one oversized one.