DIY Wall Art Projects Under $20
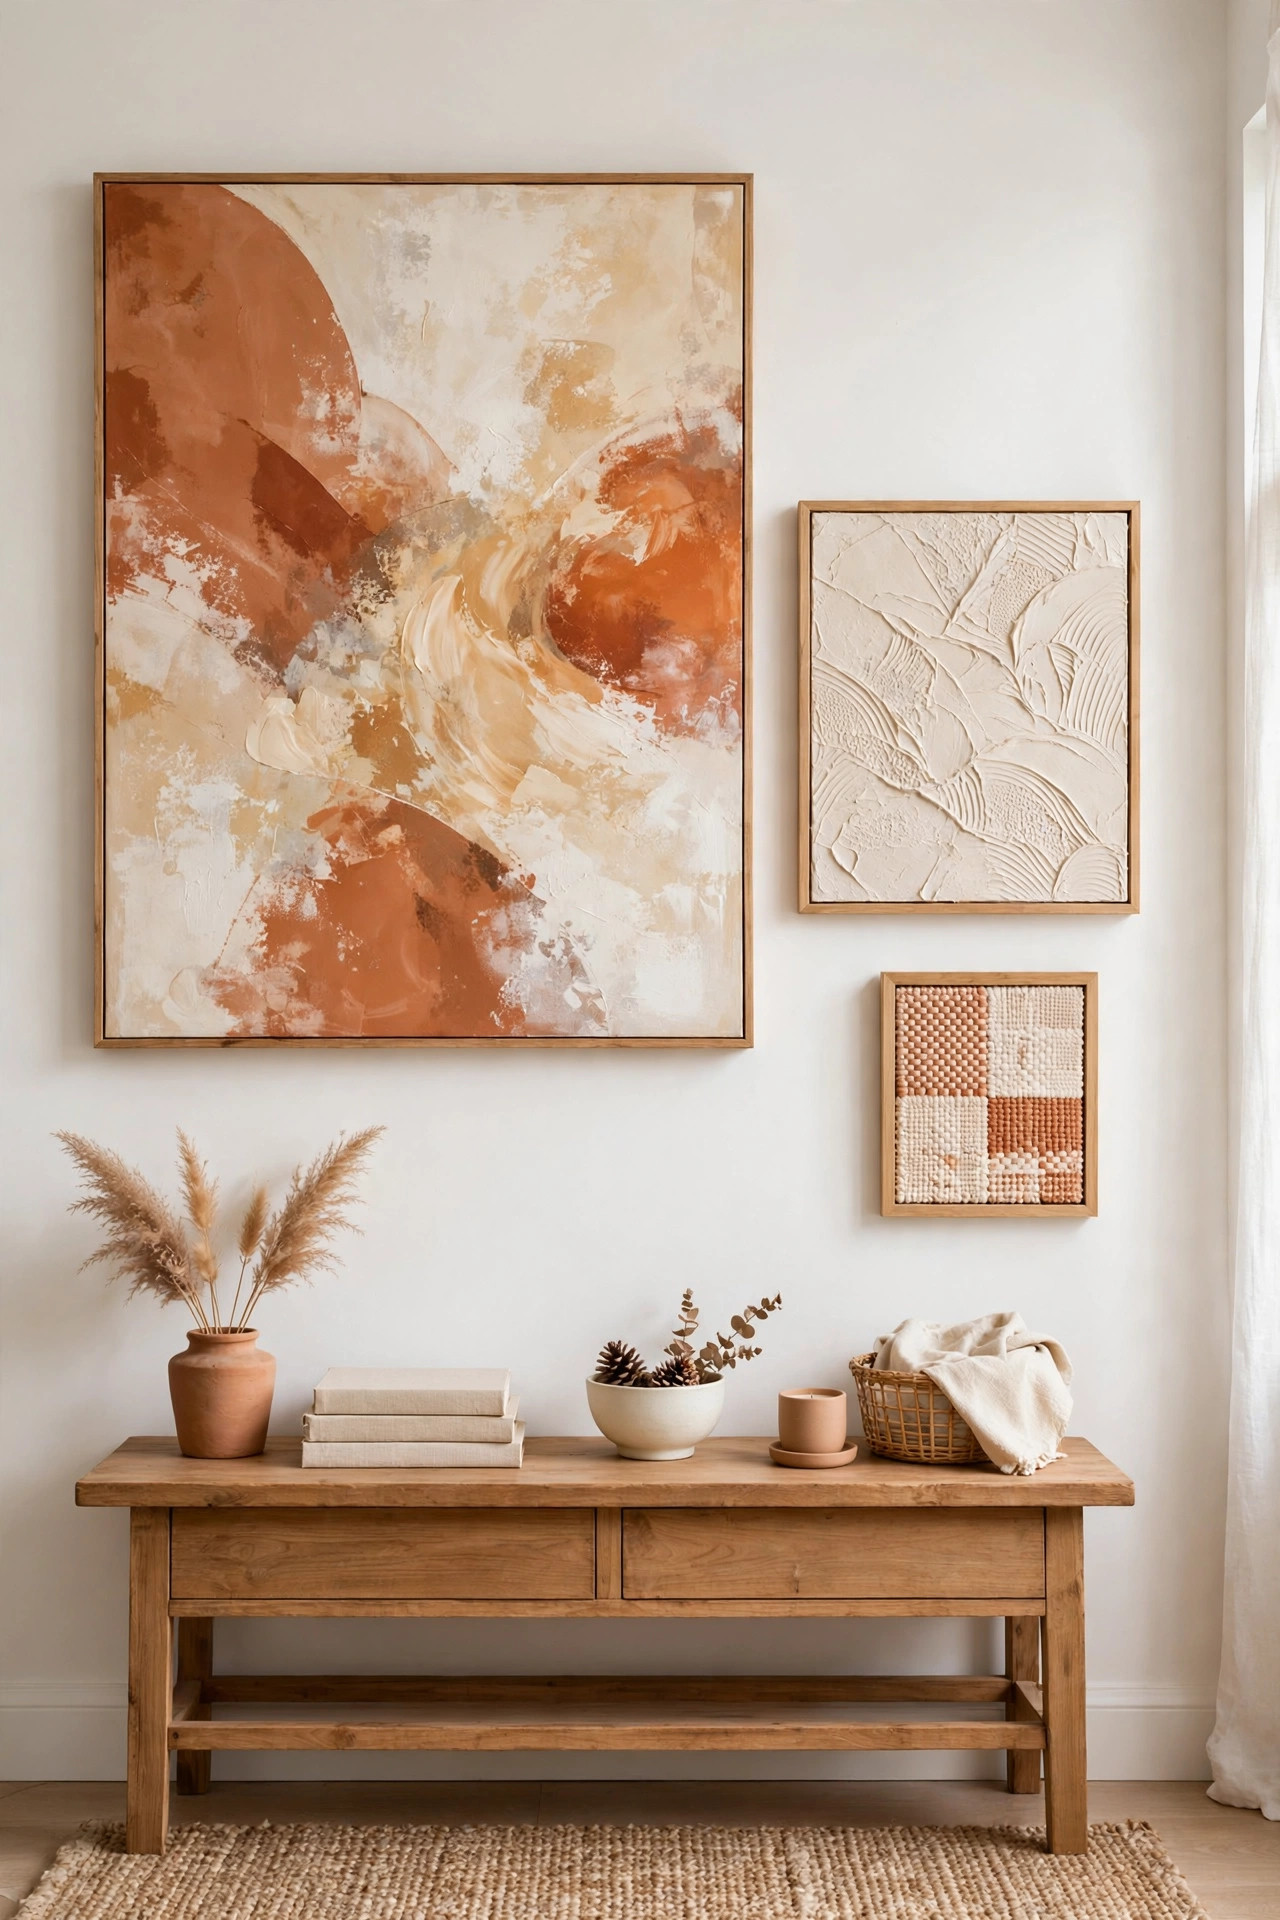
Blank walls make a home feel temporary, but gallery prices make most of us hesitate. Here's the good news: wall art is one of the easiest things to DIY convincingly. Nobody walks into a room and guesses that a textured plaster piece cost twelve dollars in joint compound. They just see the texture, the color, the scale — and assume you paid boutique prices.
This post covers four art projects that genuinely look expensive: an abstract canvas using a simple three-color method, framed fabric from the remnant bin, textured plaster art like the ones all over designer Instagram, and free printable designs in thrift-store frames. Each one takes under an hour, and each one costs between $4 and $19 per piece.
Materials You'll Need
- 2 blank stretched canvases (16x20 and 12x16) — $12
- Acrylic craft paint in 3 colors (terracotta, cream, sand) — $4
- Lightweight joint compound, small tub — $7
- Fabric remnant from the remnant bin — $2
- 2 thrift-store frames (8x10 and 11x14) — $5
- Free printable art downloads — $0
- Foam brushes, palette knife, painter's tape, pencil — on hand / $0
Step-by-Step Instructions
- Set up all four projects at once. Lay down a drop cloth or old sheet, put on a playlist, and line up every canvas, frame, and supply. Working assembly-line style means the plaster piece can dry while you paint the canvas, and everything gets done in one afternoon.
- Start the abstract canvas with the three-color method. Pick three colors that already live in your room — terracotta, cream, and sand are a foolproof trio. Paint the whole canvas cream first. Then load a dry foam brush with terracotta and drag it across in broad arcs, turning the brush as you go so the edges stay soft. Add sand in a few smaller shapes on top. The secret: use far less paint than you think, leave breathing room, and stop early. Overworking is what makes DIY abstract art look amateur.
- Finish the canvas edges and let it dry. Paint the canvas edges in your dominant color so it looks finished without a frame. Lean it somewhere dust-free for an hour while you move on to the next piece.
- Make the framed fabric art. Iron your remnant flat, then cut it two inches larger than the frame opening all around. Pull it taut over the frame's cardboard backing and tape it down on the back with painter's tape, hospital-corners style. Check the front for wrinkles as you go — that's the whole quality check.
- Sculpt the textured plaster art. Spread joint compound over the 12x16 canvas panel with a palette knife, about a quarter-inch thick. Then drag the knife through it to make arcs, waves, and ridges — channel the patterns you see in designer feeds. Go bolder than feels natural; texture shrinks visually as it dries. Let it dry fully (overnight is safest), then paint the whole piece in one color — warm white or beige — with a dry brush so the texture stays visible.
- Print the free printable. While the plaster dries, download two or three free printable designs (botanical line drawings, abstract shapes, or typography). Many artists release genuinely good freebies. Print at your local library or copy shop on cardstock — a few dollars per print — and mount in the thrift frame. The frame is doing all the heavy lifting here: glass and a real frame make a $2 print look like a $60 purchase.
- Frame and hang the finished pieces. Group the four pieces above a console, sofa, or dresser. Hang the largest piece (the abstract canvas) at eye level first, then build around it with 2–3 inches of spacing. Use proper picture hangers rated for the weight — most of these are light enough for simple hooks.
- Step back and edit. Walk to the far side of the room. A trio that works together beats a quartet with a straggler — move any odd piece to another room rather than forcing it.
Budget Breakdown
| Item | Cost |
|---|---|
| Abstract canvas art (16x20) | $19 |
| Framed fabric art (remnant + frame) | $4 |
| Textured plaster art (12x16) | $12 |
| Framed printable art (8x10) | $7 |
| Foam brushes, palette knife, tape | $0 (on hand) |
| Total (per piece) | $4–$19 per piece |
Before & After
Before: a white wall above the console with nothing on it — technically fine, completely forgettable. The room felt like the furniture had just arrived and nobody had gotten around to making it a home yet.
After: four pieces in warm terracotta, cream, and natural tones fill the wall in a loose gallery arrangement. The textured plaster piece catches the light, the abstract canvas gives the whole thing presence, and the framed fabric adds a soft textile note that keeps it from feeling like a gallery shop wall.
If you only make one of these, make the big abstract — large art is what reads as expensive.
Tips for Your Own DIY Wall Art
- Limit your palette to 3 colors. The difference between "designer" and "craft project" is almost always palette discipline. Pull the colors from a rug, pillow, or curtain in the same room.
- Go bigger than you think. Art that's too small for the wall looks apologetic. Aim to fill about two-thirds of the width above your furniture.
- Stop painting early. With abstract art, 80% done usually looks better than 100%. Step away for ten minutes before deciding it's unfinished.
- Matte paint on plaster reads premium. If you use paint with a sheen on textured plaster, it catches light unevenly and looks cheap. Flat or matte only.
- Let the plaster dry overnight. Joint compound looks dry on the surface long before it's dry through. Painting too early causes cracking — and not the good kind.
Frequently Asked Questions
- I've never painted anything. Can I really do the abstract canvas?
- Yes — honestly, it's easier for beginners than for people who took art classes. The three-color method works because restraint does the design work for you: large soft shapes, limited palette, and stopping early. There are no details to get wrong because there are no details.
- Will joint compound crack on a canvas panel?
- Not if you keep it under about a quarter-inch thick and let it dry slowly at room temperature. Thin, even layers are the key. If you're nervous, use lightweight spackle instead — it's formulated to flex and is more forgiving for beginners.
- Where do you find actually good free printables?
- Search artist blogs and design sites that offer "free printable art" — many independent illustrators release monthly freebies to build their audience. Look for high-resolution files (300 DPI at the print size) and stick to simple line drawings, abstract shapes, and botanical prints, which translate best to home printing.