Painted Tile Floor: $40 Bathroom Refresh
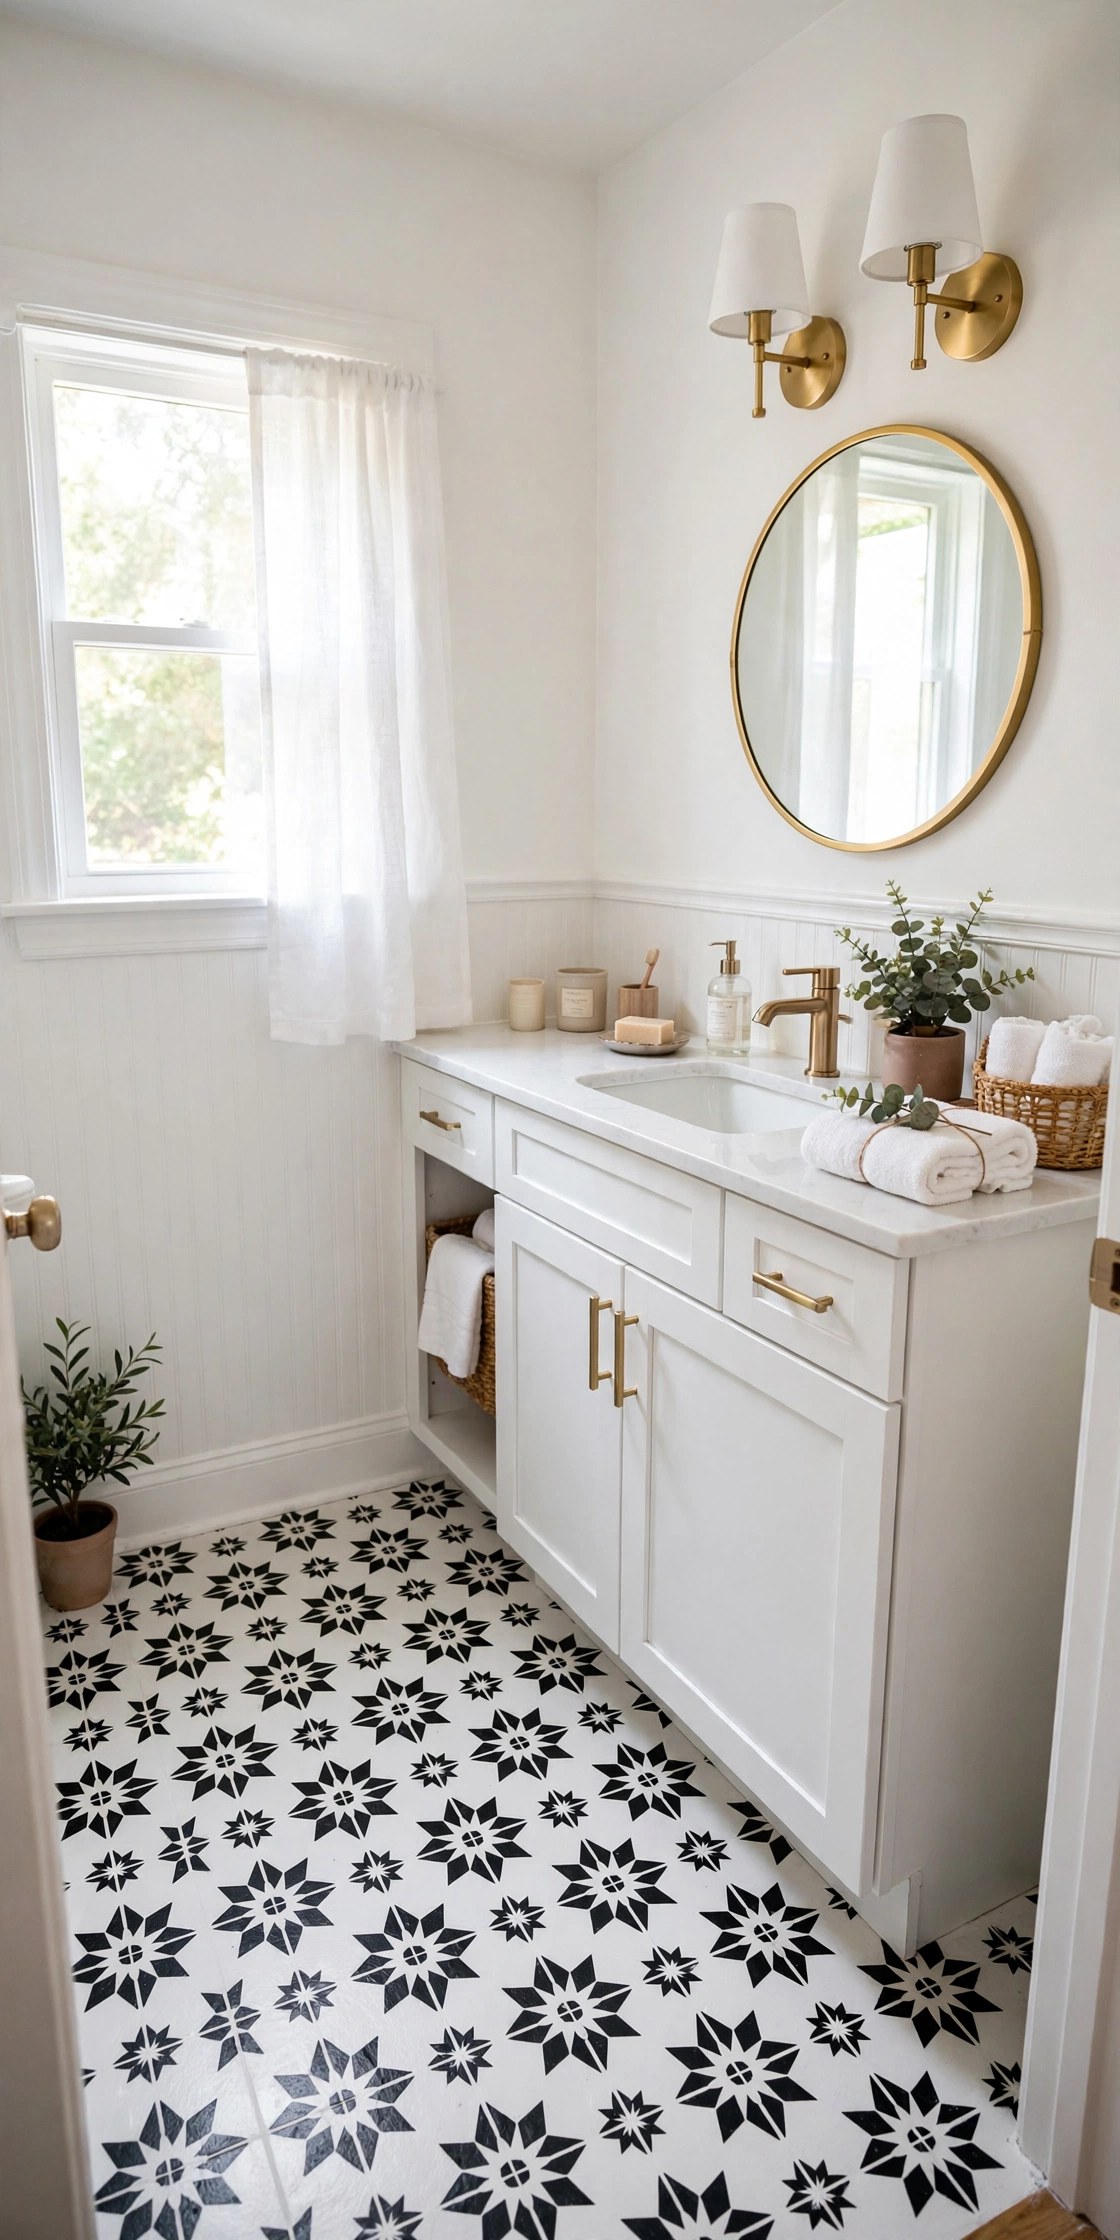
Our powder room floor was 1980s beige tile with brown grout — the kind of floor that makes the whole room feel dirty no matter how much you scrub. Replacing tile means demolition, a tile saw, thinset, grout, and easily $500+ even DIY. But tile is just a hard, paintable surface, and paint technology has caught up: with the right primer and floor-grade enamel, a painted tile floor holds up remarkably well.
This project took one weekend and $40: bonding primer, floor enamel, a stencil, and patience. The beige relic is now a classic black-and-white patterned floor that gets compliments from every guest. The secret isn't the stencil — it's the prep. Skip the prep and the paint peels in months; do it right and it lasts for years.
Materials You'll Need
- Bonding primer, 1 quart — $12
- Porch & floor enamel, 1 quart (white) — $14
- Tile stencil, 12-inch pattern — $10
- Foam roller + angled brush set — $4
- TSP substitute cleaner, scrub brush, painter's tape — on hand / $0
Step-by-Step Instructions
- Deep-clean like your floor's life depends on it. Because it does. Scrub every tile with TSP substitute and a stiff brush — paint bonds to clean surfaces and peels off dirty ones. Rinse thoroughly and let dry completely. Any wax, soap scum, or grease left behind becomes a peel point.
- Tape off everything. Painter's tape along baseboards, the toilet base, and the vanity toe-kick. Remove the toilet if you're comfortable (two bolts and a water line) — painting around it is doable but fiddly, and the ring of unpainted tile behind it will bug you forever.
- Apply bonding primer. Roll one thin, even coat of bonding primer over the whole floor. This is the product that makes the impossible possible — it's engineered to grip slick surfaces like glazed tile. Don't skip it, don't substitute regular primer. Let it cure the full time on the can (usually 24 hours).
- Roll the base coat. Apply two thin coats of porch & floor enamel in white (or your light color), letting each dry fully. Floor enamel is harder than wall paint and designed for foot traffic. Thin coats level better and cure harder than one thick coat.
- Stencil the pattern. Starting from the center of the room (so partial patterns land at the edges, like real tile), position the stencil and pounce or roll a light contrasting color through it. Use very little paint on the roller — a nearly-dry roller prevents bleed under the stencil edges. Reposition, repeat. This is meditative; embrace it.
- Seal and cure. Once the stencil work is dry, apply two thin coats of water-based polyurethane (use a leftover or borrow — a half-pint is plenty for a powder room). Then stay off the floor for 72 hours. Cure time is the unglamorous part everyone rushes; don't. Full hardness takes days, and early foot traffic is what kills painted floors.
Budget Breakdown
| Item | Cost |
|---|---|
| Bonding primer (quart) | $12 |
| Porch & floor enamel (quart) | $14 |
| Tile stencil, 12" | $10 |
| Foam roller + brush set | $4 |
| Cleaner, tape, scrub brush | $0 (on hand) |
| Total | $40 |
Before & After
Before: beige 4-inch squares with grout lines the color of weak tea, running wall to wall in a room barely bigger than a closet. The tile itself was in fine shape — no cracks, no loose pieces — which made it worse somehow. Perfectly functional and perfectly hideous, dragging down an otherwise fine little bathroom.
After: a crisp black-and-white stenciled pattern that looks like classic encaustic tile from three feet away. The pattern draws the eye down and somehow makes the tiny room feel intentional instead of cramped. Visitors literally kneel to touch it because they can't believe it's paint.
The biggest surprise was the primer. I'd braced for the paint to be the hero, but the bonding primer is the actual magic — eight months in, zero chips, zero peeling, in a bathroom that gets daily use. Every painted-tile horror story you've heard is a skipped-primer story.
Tips for Your Own Painted Tile Floor
- Bonding primer is mandatory, not optional. Regular primer won't grip glazed tile. Look for "bonding" or "adhesion" primer specifically — it's the difference between years and weeks.
- Only paint floors outside the shower/tub. Painted tile can't handle constant standing water or direct shower spray. Powder rooms and half-baths are ideal; full-bath floors near the tub are riskier.
- Less paint on the stencil roller. Offload excess onto a paper towel until the roller feels almost dry. Bleed-under is the #1 stencil mistake and it's entirely a too-much-paint problem.
- Respect the cure time. Dry to the touch in hours, hard enough for socks in a day, truly cured in 72 hours to a week. Put the "do not enter" sign up and mean it.
- Keep the stencil simple. Bold, high-contrast patterns hide imperfections; fussy detailed ones magnify every wobble. Classic geometrics are classic for a reason.
Frequently Asked Questions
- How long does a painted tile floor actually last?
- With proper prep (deep clean + bonding primer + floor enamel + sealer), 2-5 years in a low-moisture bathroom is realistic. High-traffic full baths wear faster. It's not permanent like real tile — think of it as a multi-year refresh, not a lifetime floor.
- Can I paint the grout lines too?
- Yes — and you should. The primer and paint cover grout just fine, which is actually a bonus: stained grout disappears under the new finish. Just make sure grout is fully clean and intact first; crumbling grout needs repair, not paint.
- Is this renter-friendly?
- No — this one is permanent. Painted tile can't be cleanly reversed. Get written landlord approval before starting, or save this project for a home you own.