DIY Spice Rack & Kitchen Organizers: $24
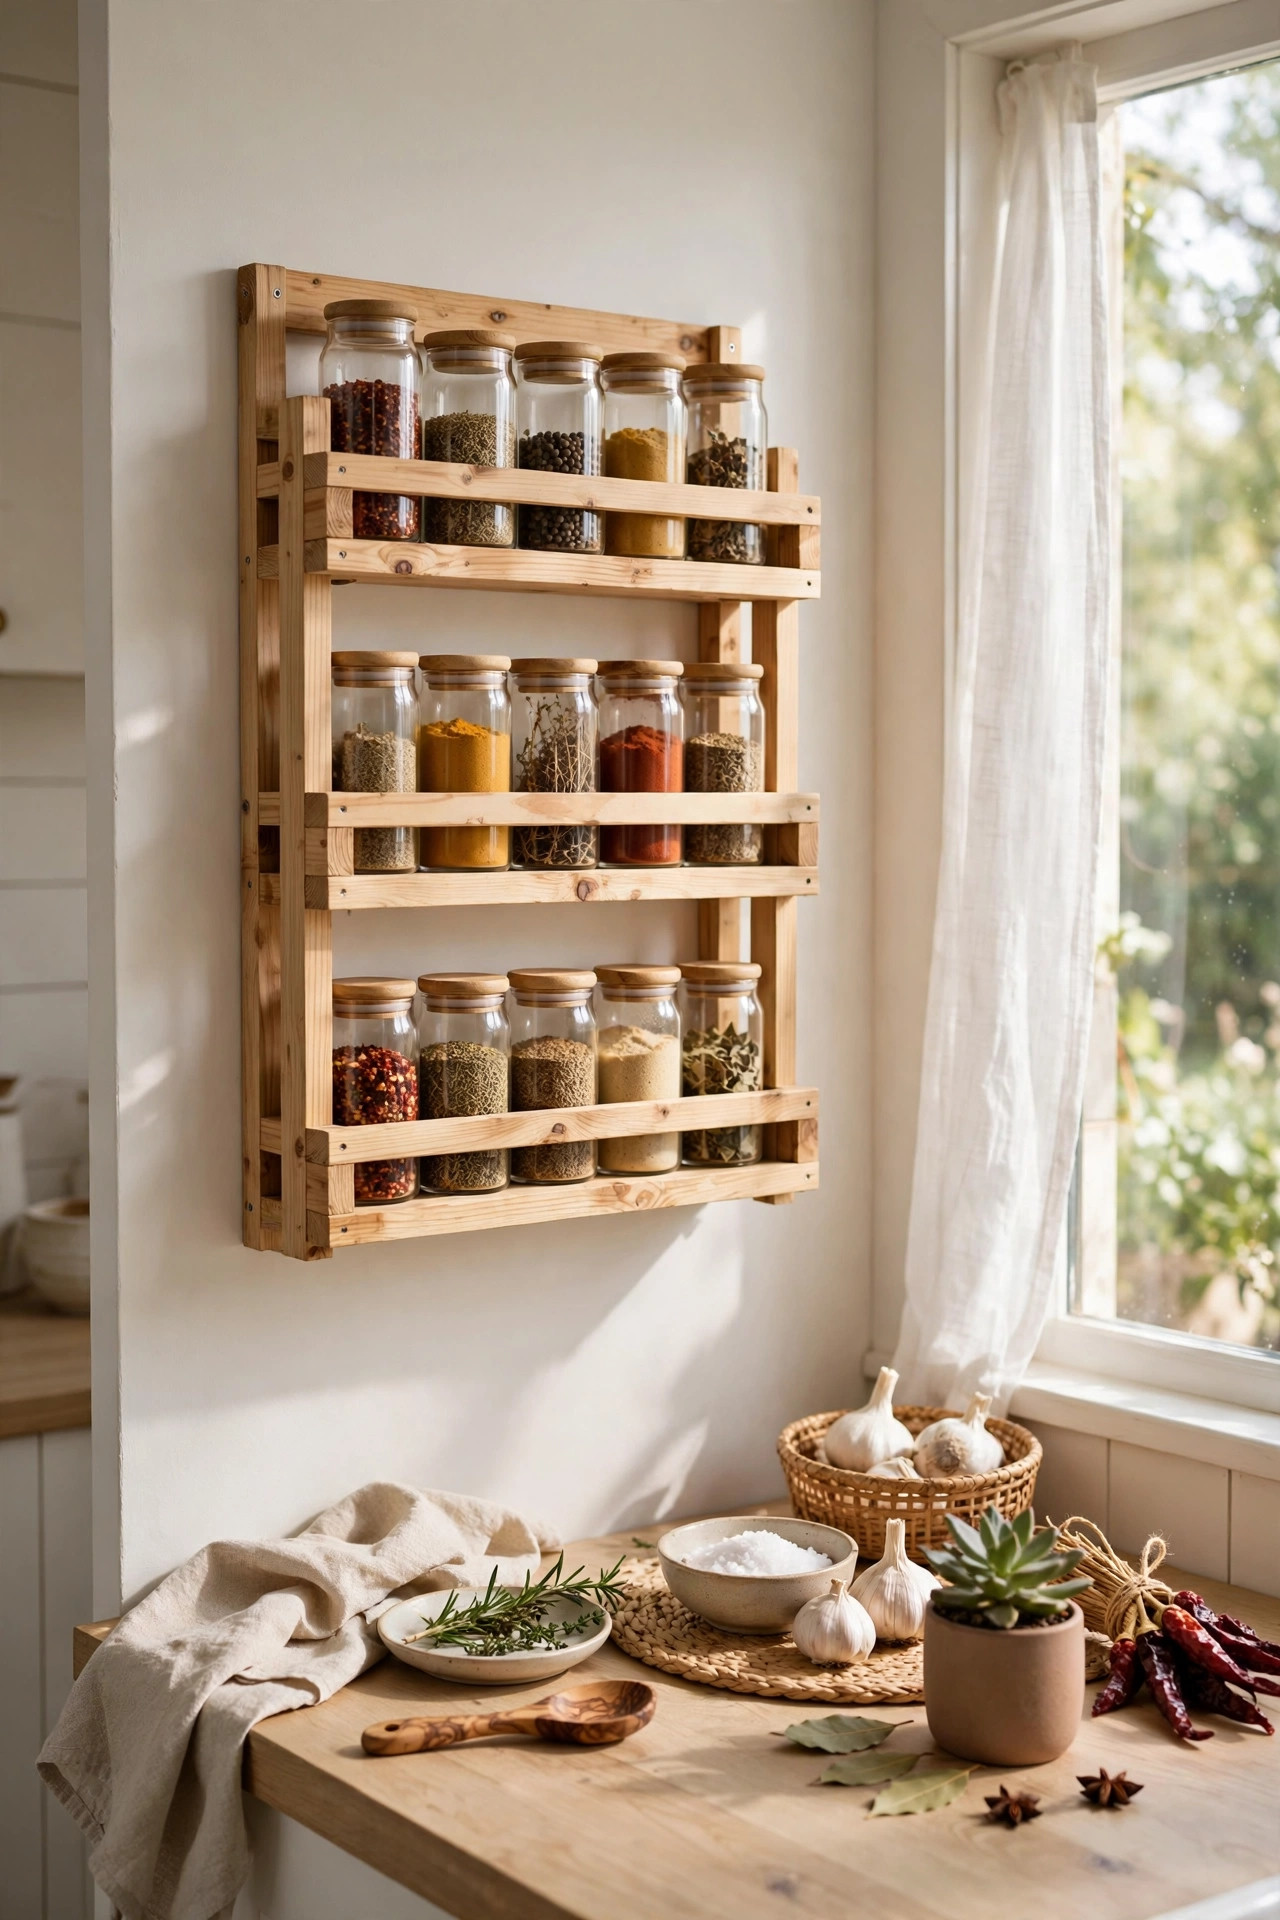
Every kitchen has a spice situation. Half-empty jars roll around in a cabinet, the cumin you need is always behind the paprika you never use, and the labels face every direction except toward you. A wall-mounted spice rack solves all of it in one move: every jar visible, every label readable, and a surprising amount of cabinet space freed up. The catch is that ready-made spice racks are absurdly priced for what is, essentially, three shelves and some trim.
This rack cost $24: one pine 1×3 board, a set of uniform 4-ounce glass jars, wood glue, and a stain sample pot. It's a tiered design — each shelf sits a little higher than the one in front, so even the back row is visible — and it hangs on the wall with two screws into studs. No fancy joinery, no table saw, just straight cuts and glue. If you can measure and sand, you can build this in an afternoon.
Materials You'll Need
- 1×3 pine board, 8 feet — $8
- Set of 12 small glass jars (4 oz) with lids — $10
- Wood glue + 1-inch brad nails — $3
- Sandpaper + wood stain sample pot — $3
Step-by-Step Instructions
- Measure your wall space and plan the tiers. Find a clear patch of wall near the stove — inside a cabinet door swing, beside the range hood, wherever you reach naturally while cooking. Our rack is 24 inches wide with three tiers, holding twelve 4-ounce jars (four per shelf). Sketch the layout and note the stud locations with a finder or the knock test; the rack needs to hit at least one stud.
- Cut the pine board into shelves and supports. From the 8-foot 1×3, cut three 24-inch shelf boards, two 8-inch side pieces, and two 24-inch front lip rails. A handsaw and a miter box handle this in ten minutes — the cuts are all straight 90-degree cuts, so there's nothing to get wrong. Lightly mark each piece with pencil so the assembly order stays obvious.
- Sand everything smooth. Hit every piece with 120-grit sandpaper, then follow with 220-grit for a furniture-smooth feel. Sand with the grain, not against it, and soften the front edges of the lip rails so jars slide past without catching. This is the step people rush and regret — ten minutes of sanding is the difference between rustic-chic and splinters.
- Stain or paint before assembly. It's far easier to finish flat pieces than a finished rack. Brush on the stain sample pot, wipe off the excess after five minutes, and let it dry fully. A warm walnut or honey tone looks great against white walls; a painted matte black rack disappears stylishly against darker kitchens. Seal with one coat of food-safe mineral oil or polyurethane on the shelf surfaces only.
- Assemble the tiered frame. Glue and nail the two side pieces to the back shelf board first, then attach the middle and front shelves, each one stepping forward and down so the tiers rise toward the back. Think stadium seating for jars: the back tier sits highest, the front tier lowest. Use a bead of wood glue plus two brad nails per joint, and check that the whole thing sits level on a flat table before the glue sets.
- Add the front lip rails. Glue and nail one thin rail along the front edge of each shelf, about half an inch above the shelf surface. These rails are what keep jars from sliding off when you slam a cabinet door nearby. Leave a quarter-inch gap at each end so the rails don't overhang the sides — a small detail that makes the finished rack look precise.
- Mount it, fill it, label it. Drive two screws through the back shelf into wall studs (or use heavy-duty drywall anchors rated for 25+ pounds if no stud lines up). Fill the jars, then label every lid or front with a label maker, chalk pen, or masking tape and a marker. Arrange alphabetically or by cuisine — anything you can scan at a glance. The whole fill-and-organize step takes twenty minutes and is weirdly satisfying.
Budget Breakdown
| Item | Cost |
|---|---|
| 1×3 pine board, 8 feet | $8 |
| Set of 12 small glass jars (4 oz) | $10 |
| Wood glue + 1-inch brad nails | $3 |
| Sandpaper + wood stain sample pot | $3 |
| Total | $24 |
Before & After
Before: a deep kitchen cabinet where spices went to hide. Reaching anything meant pulling out a sliding avalanche of mismatched jars — the tall ones from the warehouse club, the short ones from the grocery store, all with labels facing random directions. Half the collection was duplicated because nobody could see what was already there.
After: twelve uniform glass jars on a three-tier walnut rack mounted beside the stove, every label facing forward, every spice visible at a glance. Cooking now starts with a scan instead of a dig. The freed cabinet shelf swallowed a stack of mixing bowls, and the wall above the counter went from blank to the most complimented spot in the kitchen.
The tiered design turned out to be the whole game. On a flat shelf, back-row jars disappear behind front-row jars; on the stepped tiers, even the cumin in row three is fully visible. If you're on the fence about wall-mounting, build it, lean it against the backsplash for a week, and see how often you reach for it — then drill the holes.
Tips for Your Own Spice Rack
- Uniform jars are the look. The rack itself is simple; what makes it look expensive is twelve matching jars with matching labels. Decant everything, even the brand-new jars — visual consistency is free styling.
- Mount it where you cook. A spice rack across the room is decoration. Within arm's reach of the stove, it's a tool. Convenience decides whether this becomes part of your routine or wall art.
- Date your spices when you decant. Ground spices fade after about a year. A tiny "filled 10/26" on the bottom of each jar means you always know what's fresh — and it's the reason to finally toss that ancient oregano.
- Keep daily drivers on the bottom tier. Salt, pepper, garlic powder, and whatever you reach for most belong on the lowest, easiest-to-grab shelf. Reserve the top tier for the once-a-month specialty stuff.
- Hit a stud or use real anchors. Twelve full glass jars plus the rack weigh more than you'd guess. Two screws into a stud are ideal; if that's impossible, use toggle anchors rated well above the actual weight and sleep easy.
Frequently Asked Questions
- Will the jars slide off the shelves?
- Not with the front lip rails in place — each rail stands about half an inch proud of the shelf and catches the jars before they can walk off. The stepped tiers also tilt visibility toward you without tilting the jars themselves, so gravity is on your side.
- Can I build this without power tools?
- Yes. Every cut is a straight crosscut a handsaw and miter box can handle, and the assembly is glue plus small brad nails you can tap in with a hammer. Sandpaper does the rest. The whole build is genuinely beginner-friendly.
- How do I keep spices fresh in glass jars?
- Use airtight lids, keep the rack out of direct sunlight and away from the stove's heat, and buy smaller quantities more often. Glass jars with a good seal keep ground spices potent for six to twelve months — and the fill date on the bottom tells you when it's time to refresh.